Risk to Reward Ratio
Win rate gets talked about far more than it deserves. Risk to reward is the number that decides whether a strategy makes money, and understanding it properly matters more than treating it as a vague “good ratio” you’re supposed to aim for.
The maths
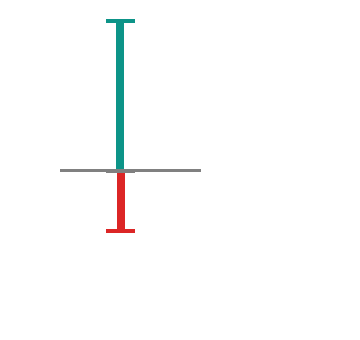
Entry in the middle, risk below (red), reward above (teal). Here the reward is roughly three times the risk.
Risk to reward is just the distance to your target divided by the distance to your stop, so risking £50 to make £150 is a 3:1 ratio, usually written as 3R. The breakeven win rate for any given R:R is 1 ÷ (1 + R), which at 3R works out to 25%, meaning you can be wrong three times out of every four and still break even before costs. At 1R you need 50% just to break even, so the ratio does a lot of the work before a single trade is even taken.
Why win rate alone is misleading
A 70% win rate sounds excellent on its own, but it can still lose money if the losers are three times the size of the winners, and a 30% win rate sounds mediocre even though it can be genuinely profitable at 3R or better. Look at either number in isolation and you’re looking at half a story, so whenever a strategy gets pitched on win rate alone, that’s the first thing worth asking about.
Example: ten trades, seven winners at 0.5R and three losers at 1R, comes out to 3.5R made against 3R lost, barely scraping by despite a 70% win rate. Ten trades, three winners at 3R and seven losers at 1R, comes out to 9R made against 7R lost instead, considerably better from a worse-looking win rate.
Where most people go wrong
The ratio gets decided the moment you set your stop and target, and then it’s quietly abandoned the moment the trade is open. Moving a stop further away to avoid being wrong turns a planned 1R loss into an unplanned 2R one, while taking profit early out of nerves turns a planned 3R winner into a 1R one, and both of those wreck the maths just as effectively as taking a genuinely bad setup. This is the exact mistake covered in The importance of targets, where a clean entry with no exit plan behaves like a coin flip regardless of how good the entry was.
Setting it before you’re in the trade
Know your invalidation, the point where the idea is simply wrong, before you know your target. That’s your stop. Then find a realistic target based on actual structure, the next level, the next zone, the next swing point, rather than just wherever gives you a nice round number. If the resulting ratio doesn’t clear whatever minimum you’ve set for yourself, that’s the thing to catch before risking anything, not after.
Key takeaways
- R:R = reward distance ÷ risk distance; breakeven win rate = 1 ÷ (1 + R)
- A high win rate can still lose money, and a low win rate can still be profitable: neither means anything alone
- The ratio is set when the stop and target are placed, and it only survives if both are respected once the trade is live
- Moving a stop or cutting a winner early quietly destroys the ratio you planned for
- Set the stop first (invalidation), then find a realistic target from actual structure, not a round number
Nothing on this page is financial advice. Trade your own account, manage your own risk.
Nothing on this page is financial advice. Trade your own account, manage your own risk.